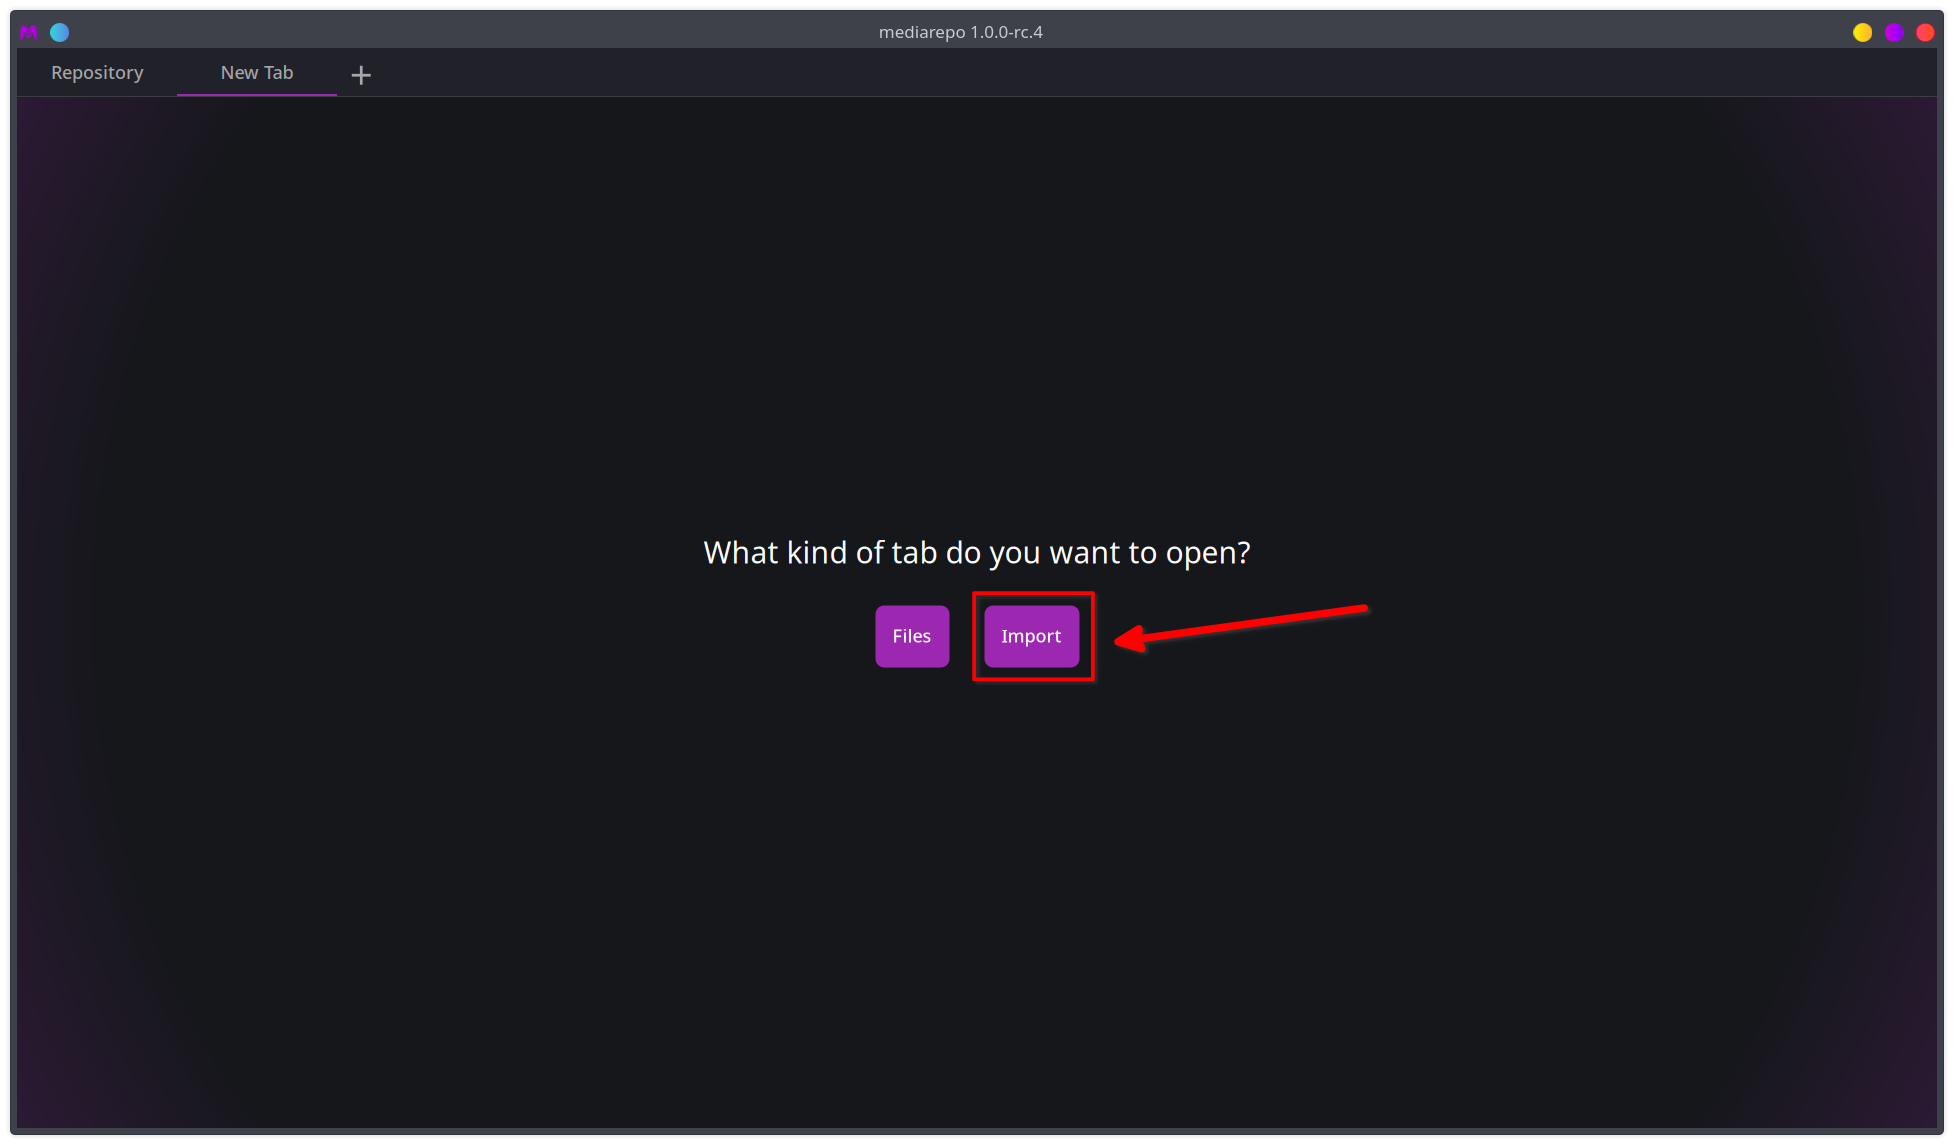
When opening a repository (by clicking on the Open button) you’re immediately prompted with the tab selection. Because our newly created repository is still empty, we need to select the Import tab first by clicking on Import.

This will change the tab type to Import and provides us with options regarding imports.

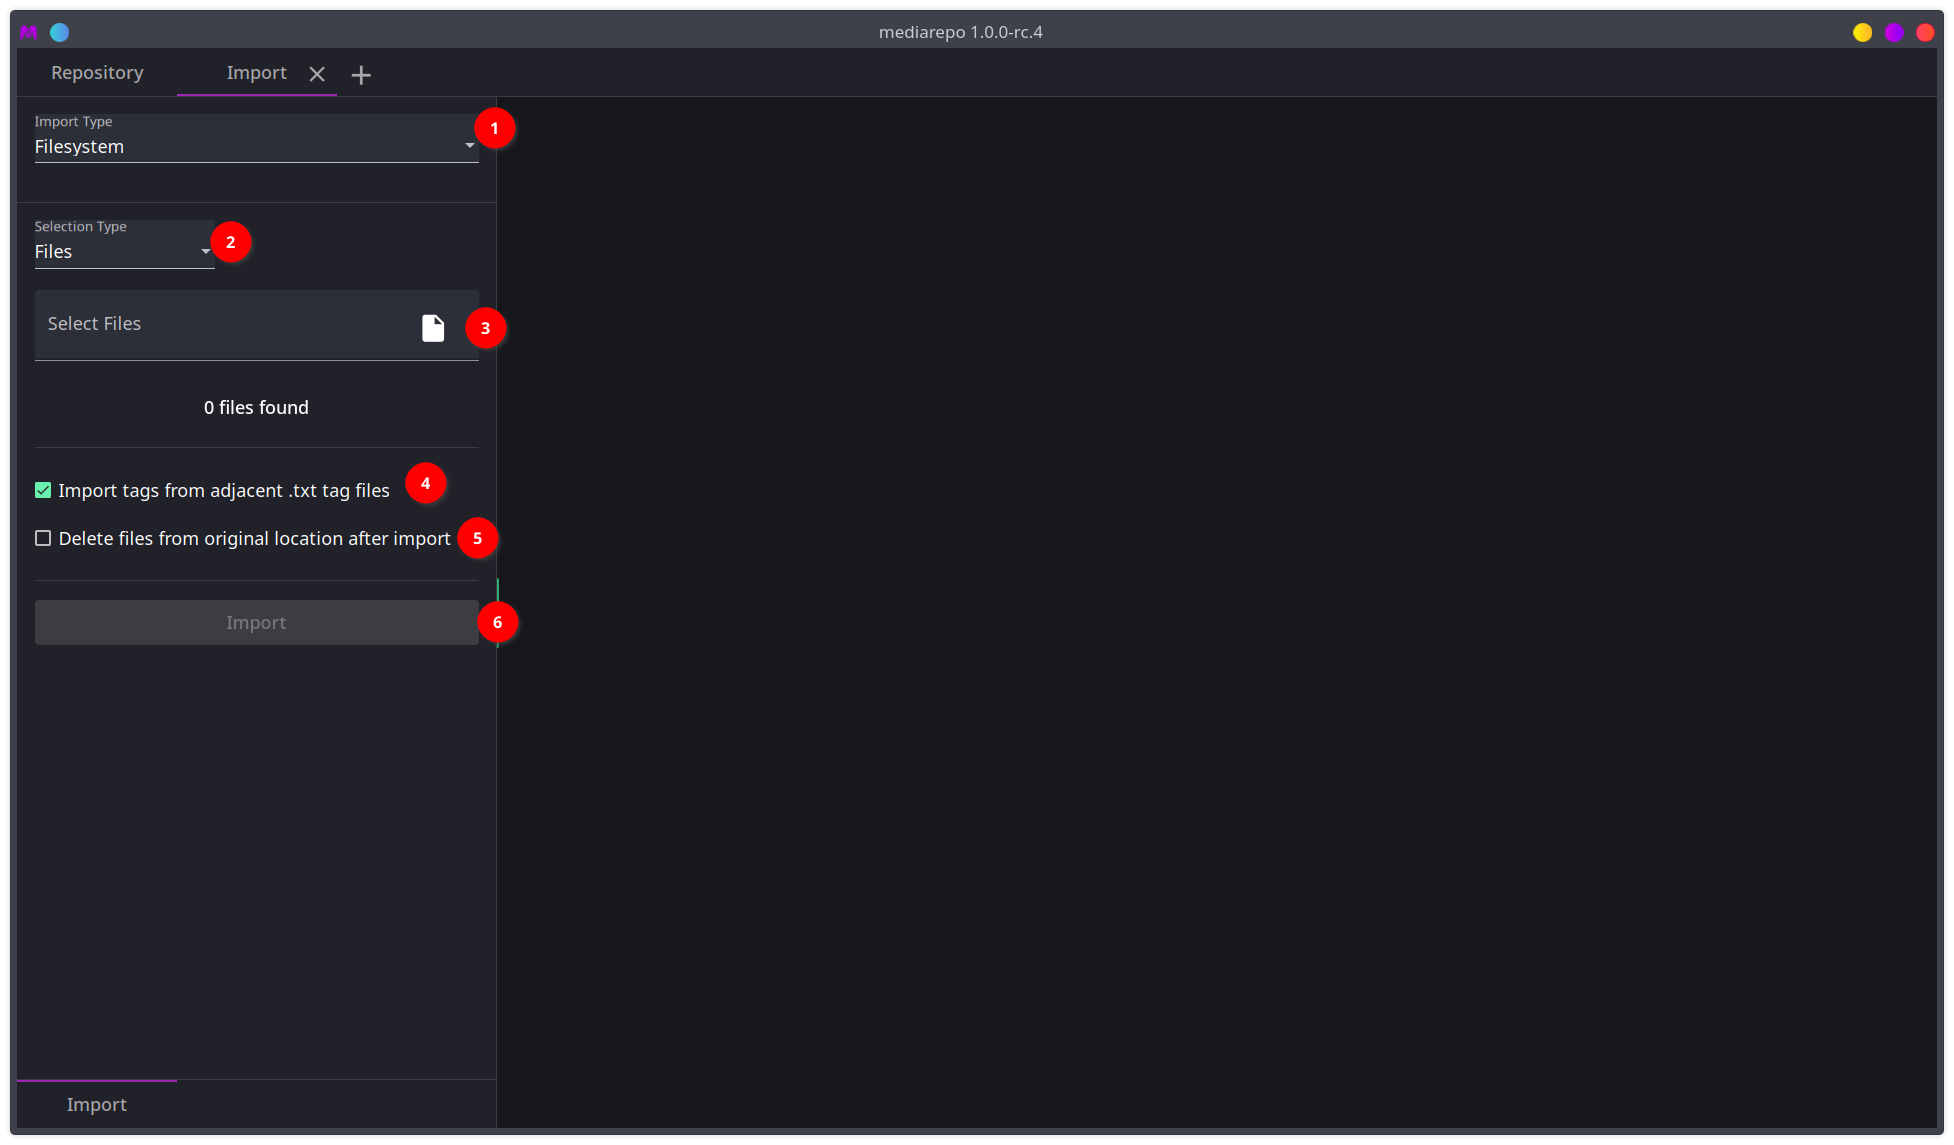
The Import type (1) currently only supports Filesystem imports but will allow for a broader import source selection in the future.
For filesystem imports we can select the type of selection we want to make (2) which can either be a folder multiselection or file multiselection. As file selection allow for a finer control over imported media types you can keep the default selection. Next there’s a file selection element (3) (or folder selection if you selected the type Folder) where you can open a file selection dialog by clicking on the file icon. After selection it will show the number of files found below.
The first checkmark (4) gives you the option to also import tags from adjacent txt files. A txt file
is considered relevant to a file if it’s named like the file with the addition of the .txt extension.
If your file is named myImage.png a tag file named myImage.png.txt is used to assign tags when checked.
The second checkmark (5) enables deletion of imported files from the original location after import. Files that failed to import will not be deleted.
When you’re satisfied with your selection of files and import configuration you can click on Import (6) to import all files into the repository.
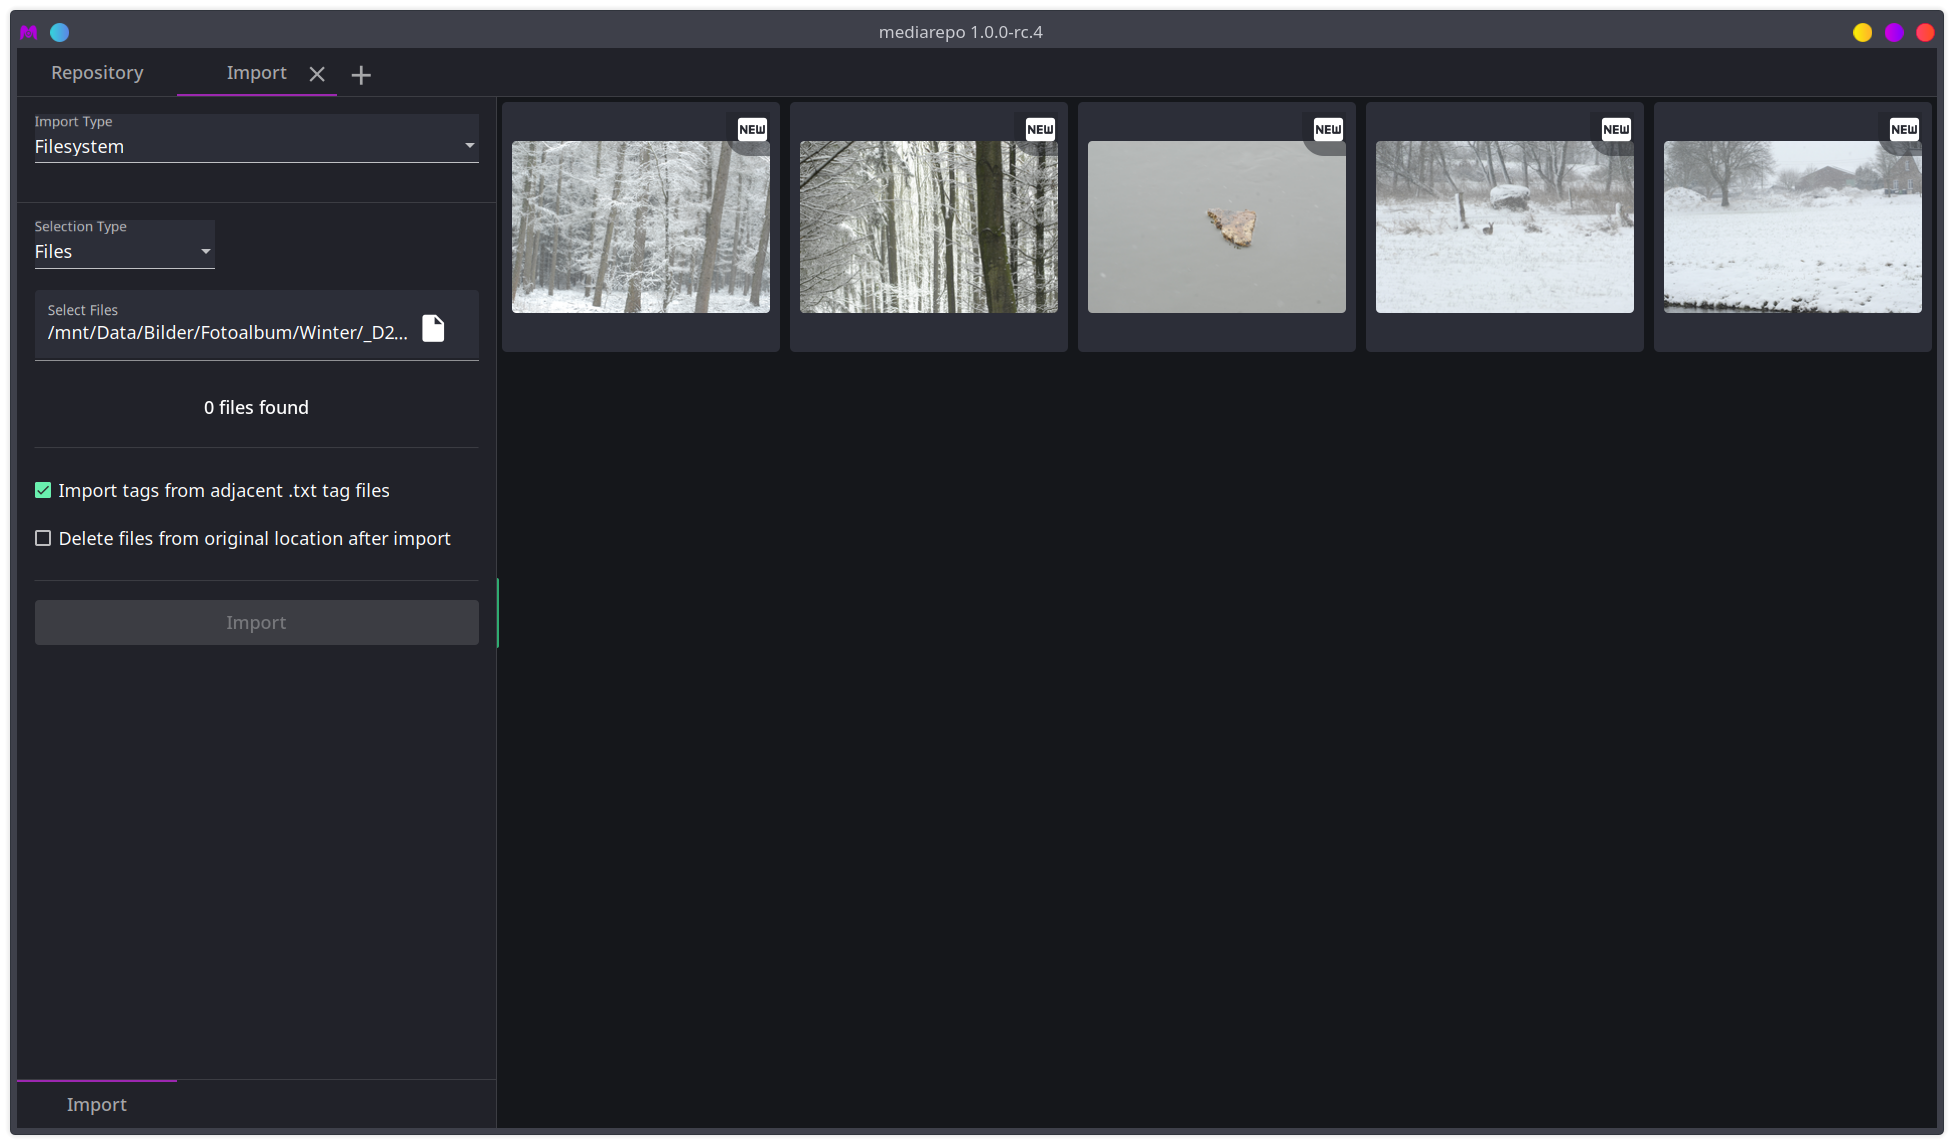
After importing your files will show up in a grid view next to the import options.

Files that are imported for the first time will have the status New. If there were any files that already existed in the repository those will still show up but their status might differ depending on their saved status in the repository. The next step would be to assign tags to those files.